DCC Turnout Control Installation
- Bench Work -
- Platform & Console Build -
- Topography -
- Ballasting & Scenary 1.0 -
- Bridge Redesign & Scenary 2.0 -
- Scenary Detailing-
- Lighting, Animation Work -
- Diorama Refinements -
- Oops - Major Nov. 2019 Track Fix -
- DCC Turnout Control Installation -
- 2020 Layout Extension -
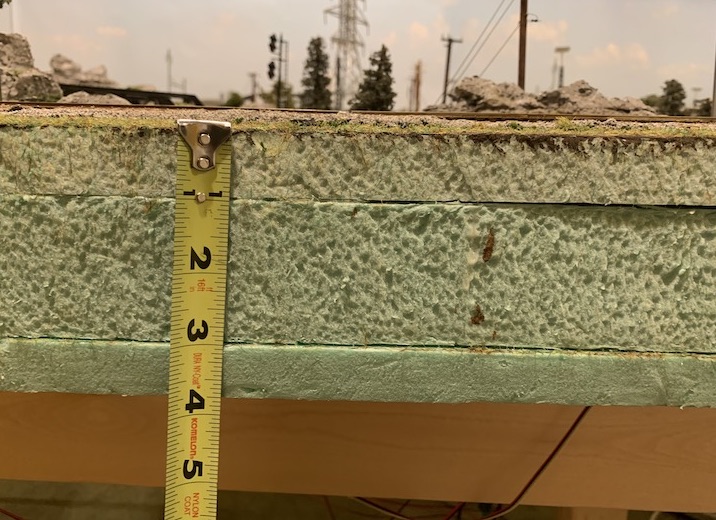
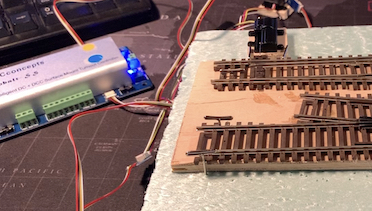
To that create the deep topology of the water effect running through the center of the layout, I use about 4.5" of foam. There may be under-board mountable turnout motor solutions out there that would work in this situation, but I figured a surface mount solution, if available, would be more servicable and practical. I looked into the Caboose Industries manual throws, but decided I wanted a remote control solution, and settled on DCC Concepts' Cobalt SS controllers and surface-mount turnout motors.
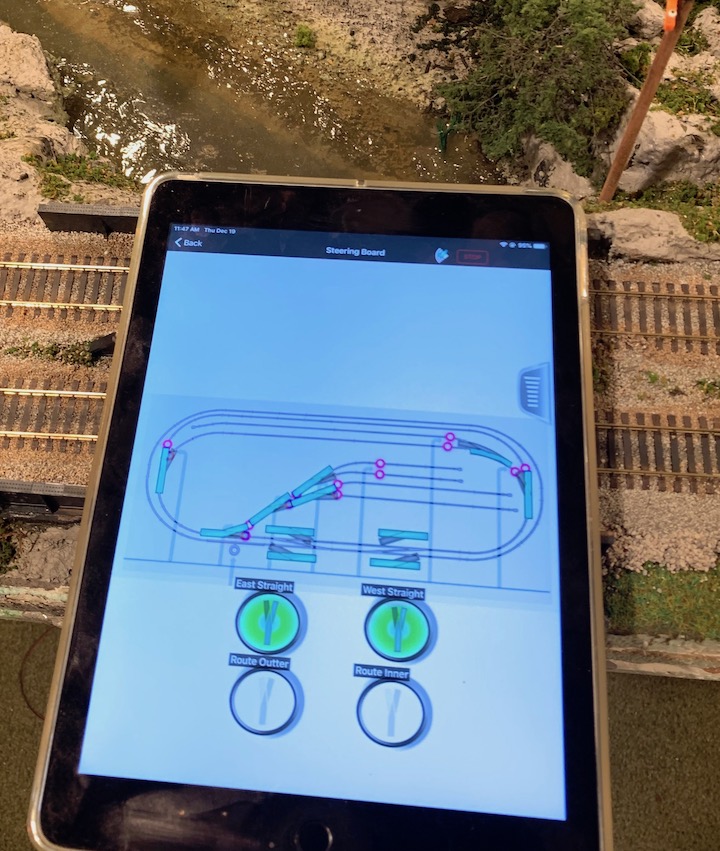
The Cobalt SS is a good choice for my set up as well, because it integrates well with the DCC command unit that I use, the Roco z21. If you're wondering why you haven't heard of these products; DCC Concepts is an Australian componany, and the Roco z21 is of Germany German manufacture (though with far less a presence in the US than Bachmann). The z21 uses a WIFI-connected mobile phone, or table interface to the DCC controller unit.
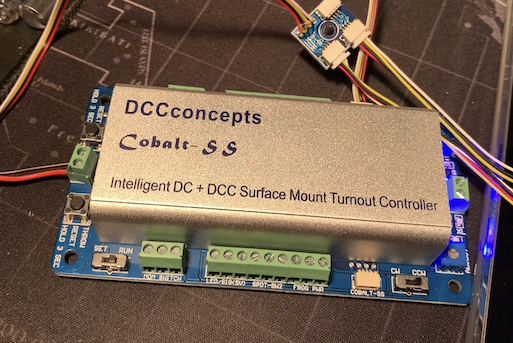
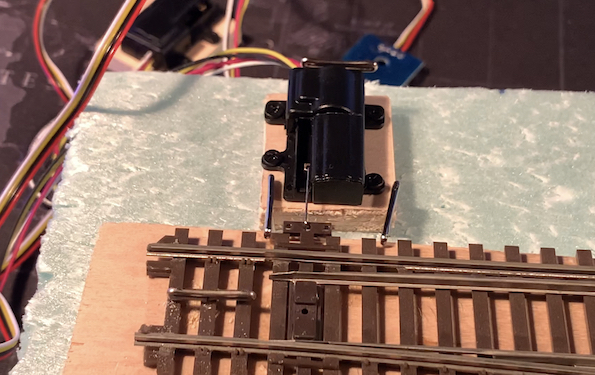
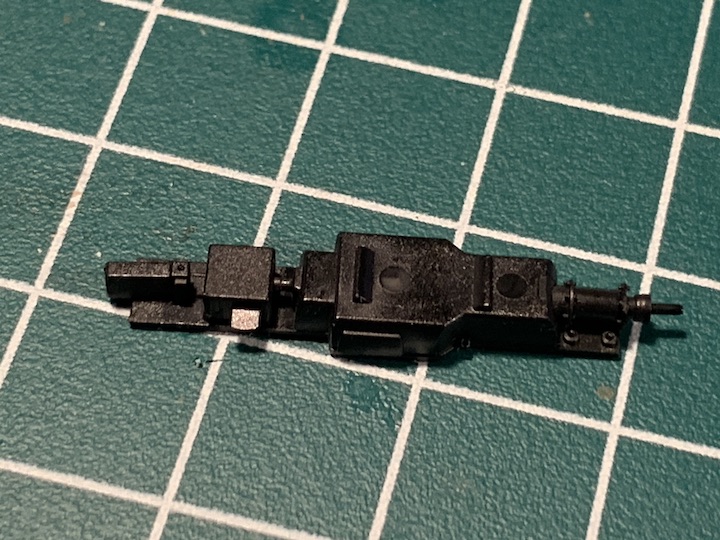
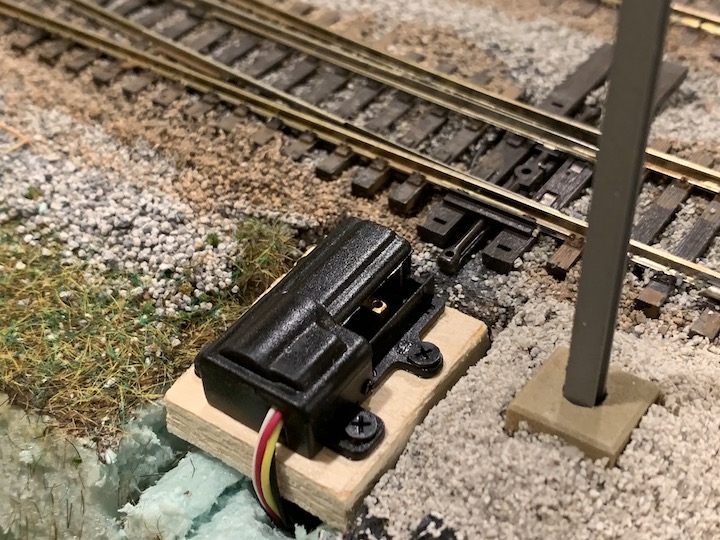
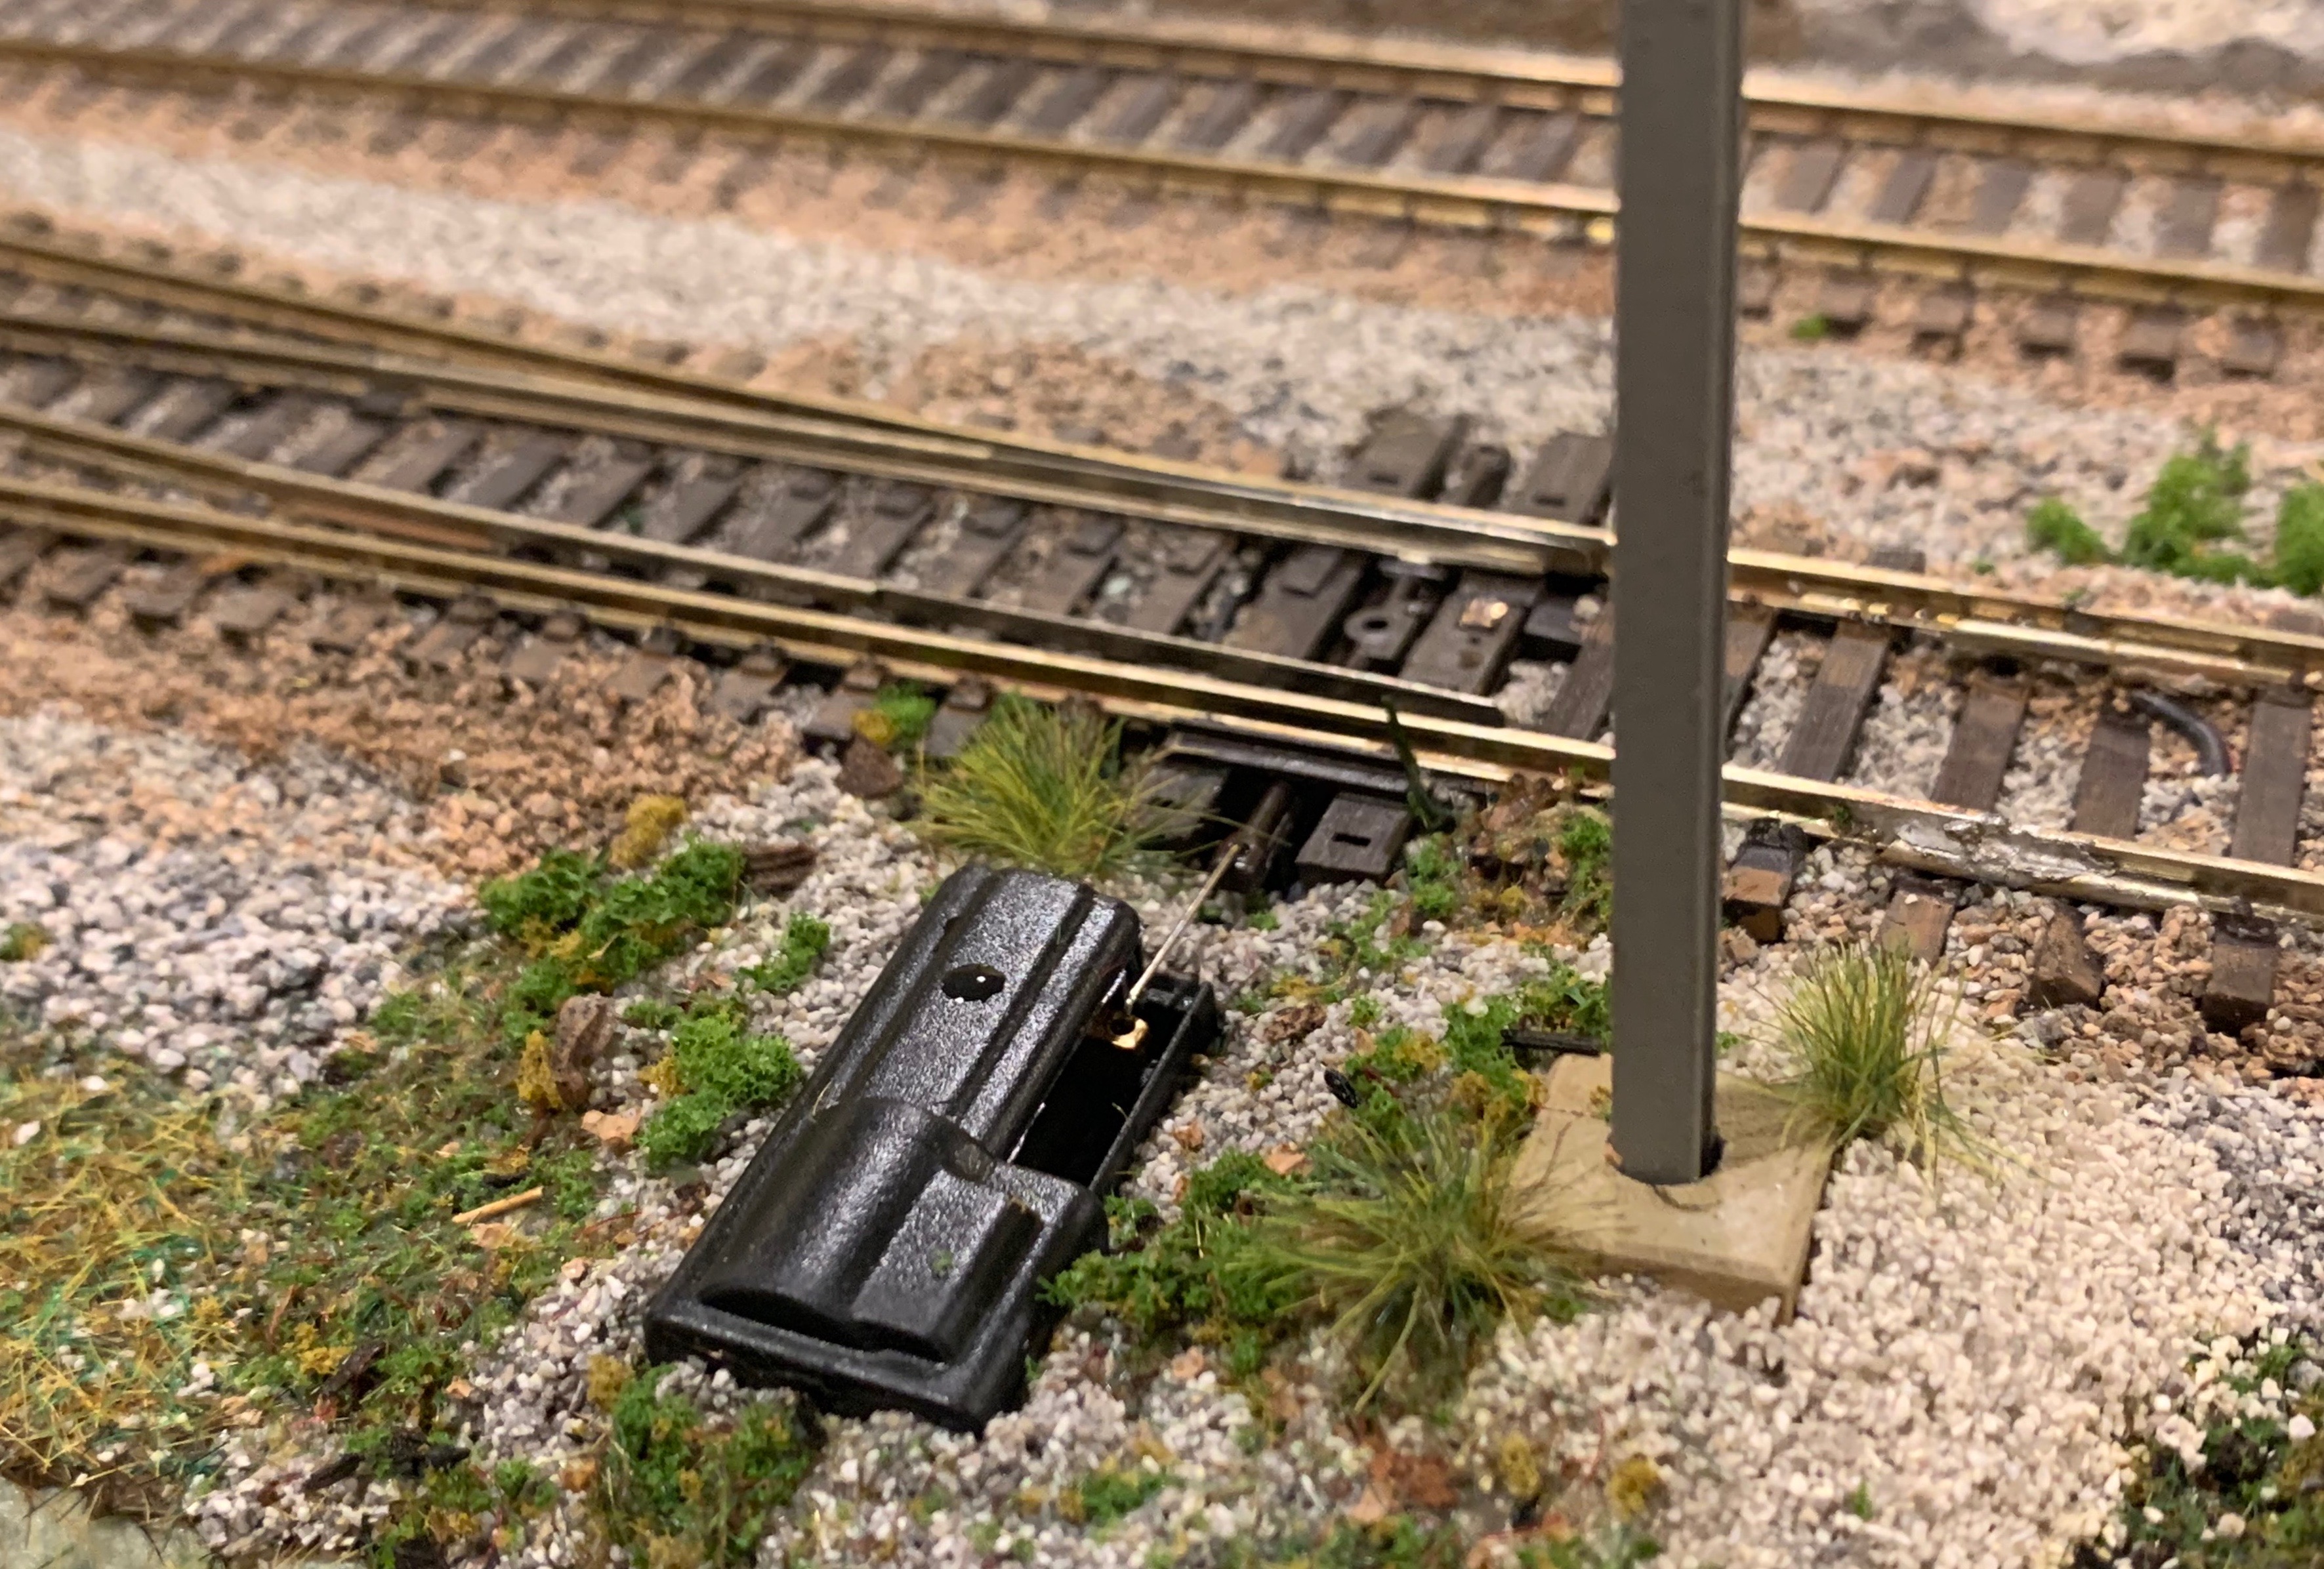
...A few pics of the jig I made to set the addresses and adjust the throw distance for the motors. Each Cobalt SS controller can manage up to four (4) turnout motors. Each pair of motors however, is controlled by a single signal. A pair of motor can be configured to both align straight, or diverge and align straight, but both motors, on each of the controller's two banks, will controlled concurrently, by a single signal. For my application, I will manage two crossovers, i.e., four turnouts, with a single controller, and ndependently control each crossover (pair). I fixed the motors on small wooden blocks for more stable anchoring to the foam bed.
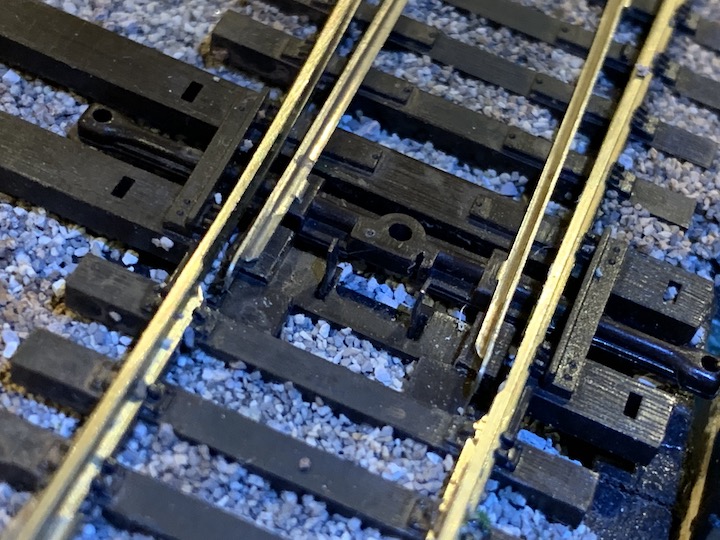
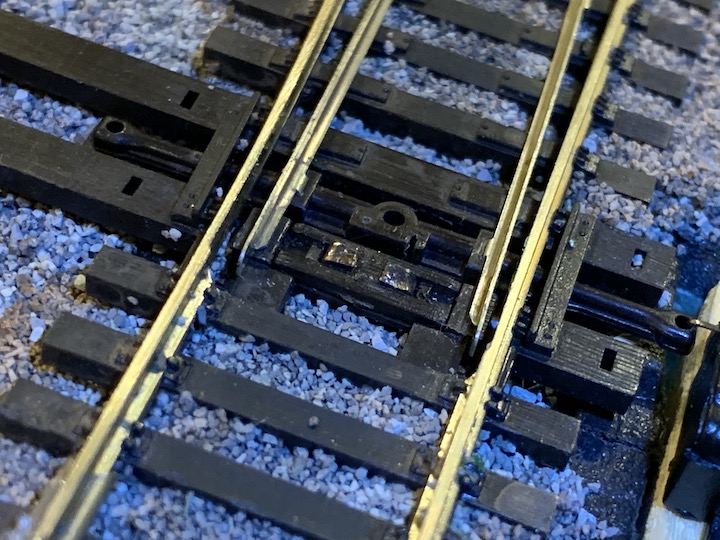
Note: Cobalt surface mount motors don't have the torque to throw spring-loaded Peco Turnouts. Fortunately for me, Peco's design allows the springs to be removed AFTER the track has been laid. This is what the spring cavity looks like when the cover is remove, and the clips turned up to remove the spring, and how it looks with the cover is in place. The clips may need to be painted over with flat black or brown paint after bending them, if like me, you scar the brass bare, trying to open them
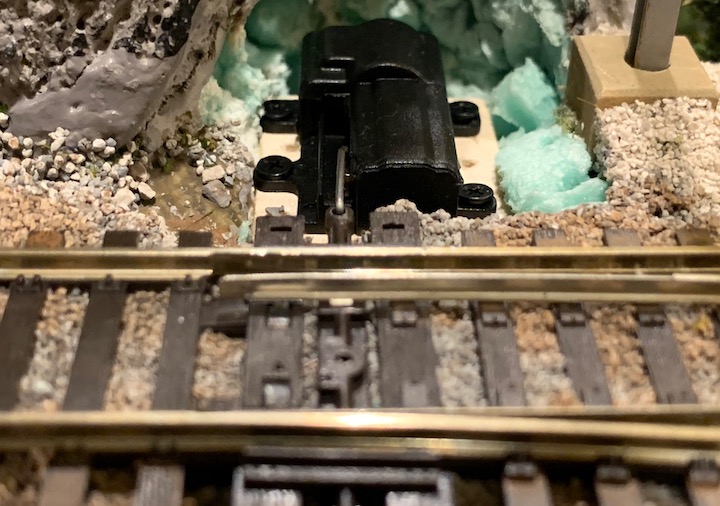
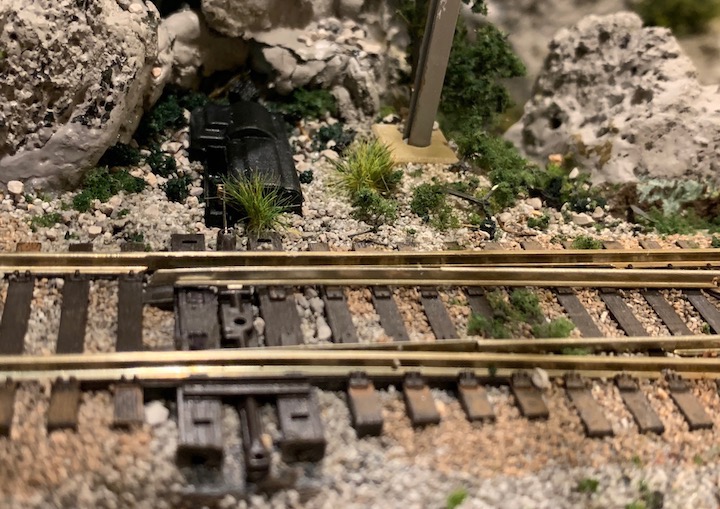
I'd hoped to mount the motors at grade, out of sight, and use the dummy Westinghouse turnout motors that come with the Cobalt SS; but that would require tube-guided throw wires and moving the motors farther back from the turnouts, and I don't have the space for that.
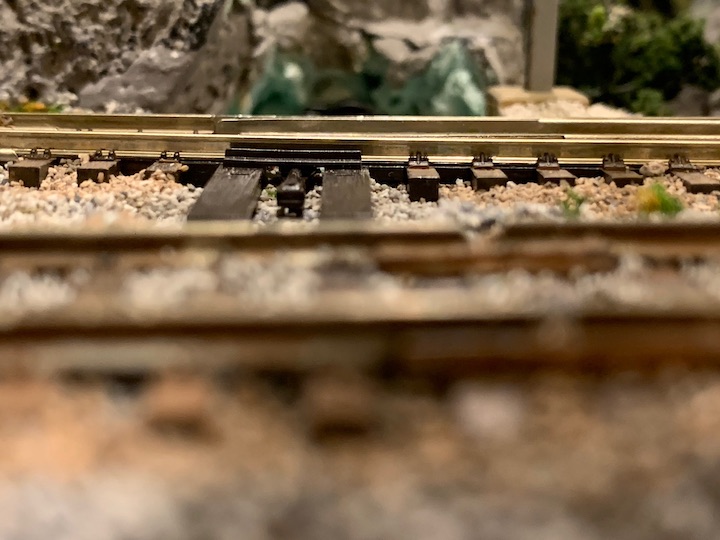
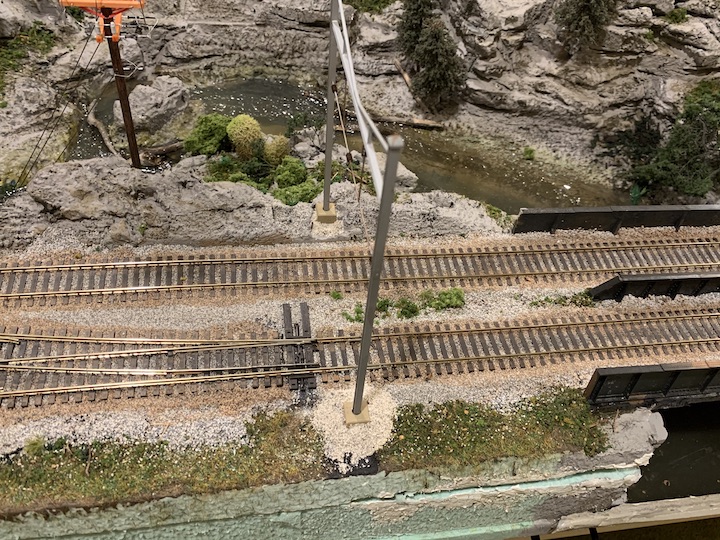
For now I'll go with this, a fairly typical installation for the Cobalt. SO far I'm very happy with how the units operate. I did have to order a additional DCC power booster, to drive the Cobalt controller used to manage the four turnouts that make up this two crossovers. I'll replace these two pic when I finish weathering and dressing up the gravel area around the motors. You'll note that I still have the support ties to cut on the right hand turnout.
- Bench Work -
- Platform & Console Build -
- Topography -
- Ballasting & Scenary 1.0 -
- Bridge Redesign & Scenary 2.0 -
- Scenary Detailing-
- Lighting, Animation Work -
- Diorama Refinements -
- Oops - Major Nov. 2019 Track Fix -
- DCC Turnout Control Installation -
- 2020 Layout Extension -
| Return |